
Do you use the Engineering Design Process with your students? Of course you do, but how many kids actually understand it?
When students first begin to work on engineering design challenges, they tend to think that the Scientific Method and the Engineering Design Process are interchangeable. While they might have similarities, they are very different with the Scientific Method used for making predictions about our world and the Engineering Design Process used for solving problems.
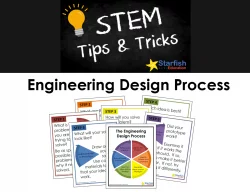
So what exactly is the Engineering Design Process? The EDP is a six step process used to guide students (and adults!) through solving a specific problem. Using a methodology called iterative design, the EDP helps students prototype, test and redesign their ideas until they find a viable solution.
1- Identify the Problem
First, before we start the process, we need to determine what problem we’re attempting to solve. Most inventions and innovations were developed to solve a specific problem and/or make a task easier. For example, the invention of the light bulb solves the problem of providing light for homes and streets at night.
2- Identify Criteria and Constraints
Next, identify any criteria and constraints that must be followed when solving the problem. As defined by NGSS, criteria are requirements for a successful solution and constraints are limitations that must be taken into account. In our light bulb example, one criteria was that the bulb must burn brightly and one constraint was that it must last for a reasonable amount of time before burning out.
3- Generate Ideas and Strategies
Once the problem has been identified and the criteria/constraints defined, it is time to brainstorm different solutions to the problem. During this stage, all ideas are valid and should be documented. Edison, the main inventor of the light bulb, was known for keeping all of his ideas in notebooks and filled over 3,000 of them over his lifetime
4- Select and Idea or Strategy
After brainstorming ideas, select your best one to start with. This idea should do the best job of addressing both your criteria and constraints.
5- Build a Model or Prototype
Then, build a model or prototype of your best idea. Test it to determine if it does what it is designed to do. In our light bulb example, Thomas Edison and his team tried over different 1,000 ideas to find a solution for the light bulb.
6- Refine and Improve
If your prototype does what it was intended to do and solves the problem through abiding by the criteria and constraints, work to refine your design to make it better or easier. If your prototype did not work well in testing, improve it or select another one of your ideas to try.
Using the Engineering Design Process helps kids better understand how to solve a problem and also provides necessary scaffolding to find a viable solutions to everyday problems.
Need help teaching the Engineering Design Process to kids? Try the Engineering Design Process packet containing a full-page poster of the EDP, half-page wheels for student notebooks and a one-page poster to help with each step.
Get the Engineering Design Process Posters
Subscribe to Stay Connected!
-
Engineering Design Process Posters
$2.95 -
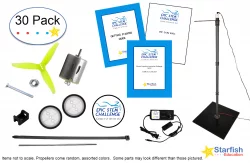
EPIC Flight Circle Kit Bundle
$0.00 – $399.95 -
Brown Bag STEM Challenge II – Bundle Pack
$23.95 -
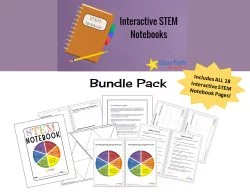
Interactive STEM Notebook- Bundle Pack
$18.95